Friday, December 16, 2011

Benefit Pieces: Owls & Jackalope

In the wee hours of the morning on December 1st, the apartment of a good friend of mine burned down. She and one other roommate were treated for smoke inhalation; another two roommates almost lost their lives. The majority of their belongings were destroyed.

Read a news article about it here.

Tonight, I attended an event to support and raise money for them. The following two paintings were made specifically for this occasion, to be raffled off. Both were done on found pieces of plywood.

"Jackalope!" 10.75" x 13.75" on 3/4" plywood

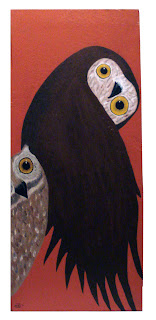
"Who's There?" 10.5" x 25.25" on 3/4" plywood

It seemed like each of the winners loved their paintings. However!

If you (you winner, you!) are reading this and are NOT happy with your painting, I will gladly buy it back from you. My partner fell in love with both of them and was so sad that I was "giving" them away. Please contact me via email -it is on the back of your painting- if you would like to sell it back, or trade it in for something else hand made (or found!).

Wednesday, November 23, 2011

fox in the snow


pie!

Not the most traditional form of art, but I'm proud of it. Turkey decoration was cut freehand. I made the filling 100% from scratch (look ma, no cans!).


And it tastes good!


Friday, October 14, 2011

Monster #4

aka "last-minute monster". I made this guy in the beginning of September, and can't believe how "quickly" I was able to throw him together. 11 days, but many many hours. No pattern used. He is also a hand puppet.


Click on any of the images to see them larger.

collage!


detail shots
Monster Party!! All three made so far.


Tuesday, August 30, 2011

Today, I pickled

While this is mainly an art blog, I will be posting from time to time about my adventures in urban homesteading: gardening, preserving, making cheese and (eventually) beekeeping.

Currently, I get a weekly CSA (community supported agriculture) box from organic and local Eatwell Farm. It contains a generous portion of produce, and factoring in that I eat staff meal at work 4 nights a week, lasts me all week. My pickup day is Thursday, and conveniently, the pickup location is literally around the corner from my apartment. Eventually, I would like to grow most of my own produce, and get the CSA boxes bi-weekly as a supplement if needed.

Hand in hand with growing food, is preserving. Fresh produce only lasts so long once picked, so in order to preserve a bountiful harvest, you pickle and can. Today, I pickled 2 kinds of peppers and young zucchini that I wouldn't have time to eat by Thursday. In truth, I improvised with the pickling spices a bit, since I did not have whole peppercorns, allspice, or coriander as most brine recipes suggest. Instead I used bay leaves, a cinnamon stick, and coarse ground pepper. We'll see how it tastes in a few days!


Chalk boards!

I have been doing the art on the "86" board at work for a while, but have only photographed the last three pieces I have done. Every 4-8 weeks I change it up.

Contact me if you are in the SF Bay Area and want to apply my talents to your chalkboard! I am also available to do indoor murals.


California Condor. (May 2011)


*note: there was more to the condor, but the photo was taken funny
Nastyass Honey Badger says "get away from my honey, you pesky bees!" (June 2011)

I simply love snails! (August 2011)

detail


Wednesday, July 6, 2011

owl plush/pillow

A very simple little fellow. Rough dimensions: 12"x8"x3"

Maybe he'd make a nice decorative pillow.

sketch

I love sketching on brown paper

some art cards

Below are some ACEO I did a few months back, just haven't had a chance to post them. Here is some info on ACEO if you are unfamiliar: http://www.art-cards.org/


Tuesday, May 10, 2011

Mole Plushy

This is collaboration between friend Claudia Sutton and I for a client of hers. The character I am building in fabric is an adorable little mole from one of Claudia's illustrations. You can see it HERE.

I will be updating this blog post with the progress of this piece.


Usually I approach "plushes" of my own design in a free form sort of way. I make a pattern and adhere to it loosely, letting any mistakes or snafus become part of the piece itself. Because I am trying to recreate someone else's design as closely as possible, I have approached this project in a more architectural manner.

Supplies

Wire Armature (and a claw)

"Fleshing Out" the armature
My favorite thing about documenting my work stage by stage in a blog is that it makes me take a step back and examine what I have done. It helps me see things I may not see when I am sitting twelve inches in front of whatever it is I am working on. For example, in the last photo of the above sequence, I can see that the shape of the arm is not following the reference drawing. The beauty of first building a wire armature is that it can be easily remedied. A couple of small bends and the arm is back in now back in proportion.

nose
eyes
I traced over the eyes on the drawing Claudia gave me for reference and used Sculpey like silly putty to pick up the pencil lines. This will help me get the shape of the eyes and eyelids perfect on the final piece. Don't mind the pieces of lint in the white - they will be polished off.
ready to get baked!
sculpey claws
sanding, then polishing the claws after they have baked
the difference between unpolished and polished

The fabric I chose is a synthetic suede. The feel of it is soft and velvety, and it is pliable.

the material (color is off. see below photo for accurate color)

wrong side (left) and right side of the material
Instead of having a seam between the coat and tummy colors, I have decided to dye the fabric. Batik, a wax-resist dying technique, is one method of dyeing fabric. In the sample below, the light areas were protected by wax.
Sample Batik
Much more attractive than a seam, right? The above sample was made quickly and with important steps omitted - I just wanted to see if it would work on a textured velvet or suede-type fabric.

pinning his separate parts
moleskin! after being turned out
Why, it's a pleasure to meet you to, Mr Mole!
Here, Mr Mole's skin has been all sewn together, and I have pulled it over the frame to check the fit to see if minor adjustments need to be made before I start dying the fabric. I have taped on bits of paper and yarn, and loosely positioned his claws to give me a sneak peak of what he'll look like when done.

My kitchen table doesn't always look like this
After doing a little experimenting, I decided that instead of batiking the fabric, I will use custom-mixed Dye-Na-Flow dyes to color his fur. Dye-Na-Flow can be applied by brush in layers to build up color, and can be heat-set using an iron or 30+ minutes in a laundromat dryer on the highest heat setting.

Ta-da! Meet the finished Mr Mole! I was running a bit behind my projected due finish date for this guy, so I stopped documenting as faithfully but really all you missed were some finishing details - hot gluing and getting his belly the right color.



Friday, January 14, 2011

The Sketchbook Project 2011: Finished Product

Lots of photos. For those of you with a slower internet connection it may take a bit longer to load.
Clicking on any image will open a larger version (right click for new tab/window).

Images are in the order of appearance in the book.
*EDIT: I just realized that I missed the page spread (p 18-19) between the dead bird and the foxhunt. Or possibly my camera ate the photo. Will try to get a shot of it when it comes through here. 

The tour starts in mid-February. For Sketchbook Project tour dates check HERE. I believe more tour dates may be added.. If you would like a tour date added in your city it might be worth it to try and contact them.

The theme I chose was "It's Raining Dogs and Cats".


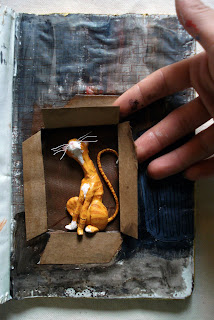
The last photo is the same sculpture, from different angles. As seen in the second to last photo, one of the legs cracked but held together fine since I used wire to reinforce them.

It will be interesting to see the state of the book by the time it gets to San Francisco in June.